
Device Code Phishing: A Frontend UI
Background#
Device code phishing is by no means a new phishing technique, the technical details of this have been covered in several blog posts. The idea is to abuse Microsofts (OAuth 2.0) device code authentication grant flow to compromise Office 365 accounts. There are pros and cons to using this technique such as:
- pro: bypassing MFA
- pro: no need to create phishing infrastructure
- con: device codes are only valid for 15 minutes
Originally, I planned on modifying the Gophish toolkit to add support for device code phishing. However, the more I added features and bent gophish to doing what I wanted, the more I realised that the information we are interesting in tracking and viewing as an operator is really different to the output that gophish tracks. For example, we are not interested in seeing if a victim clicked the link or submitted their password - we only want to know if a device code has been used by a victim.
So I built a new phishing tool called phishsticks to handle fetching a new device code, sending it to the victim, and polling Microsoft to see if the code has been used.
Overview#
If you have used gophish before, you should feel pretty comfortable finding your way around this tool. I intentionally kept the layout close to gophish for familiarity and ease of use.
Note: this is the initial development release and needs to be tested to work out any bugs / issues. I have done as much testing on my own and there are a few known issues but the main functionality is working as intended.
Usage#
Targets & Groups#
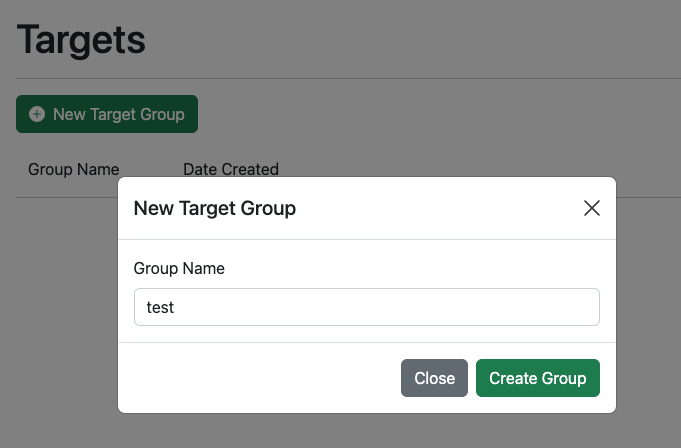
First create a target group to be used by your phishing campaign. This can be found under the “Targets” navigation menu.
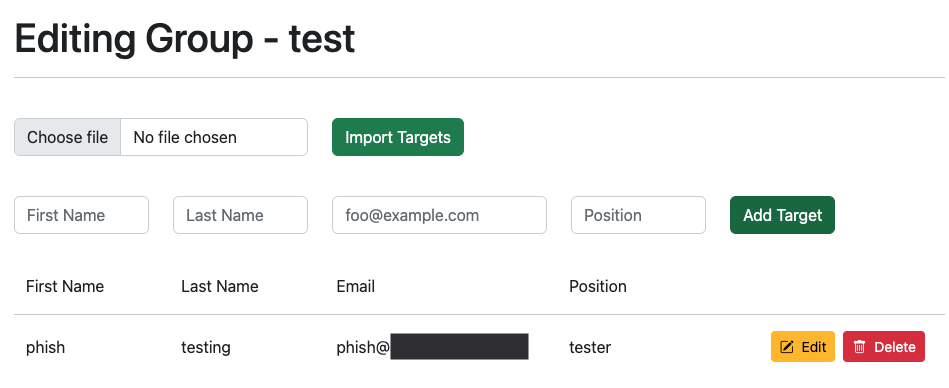
Once you have created a target group, you can manually add users one at a time or upload a list of targets from in a CSV file. The format should be the same as gophish.
Email Template#
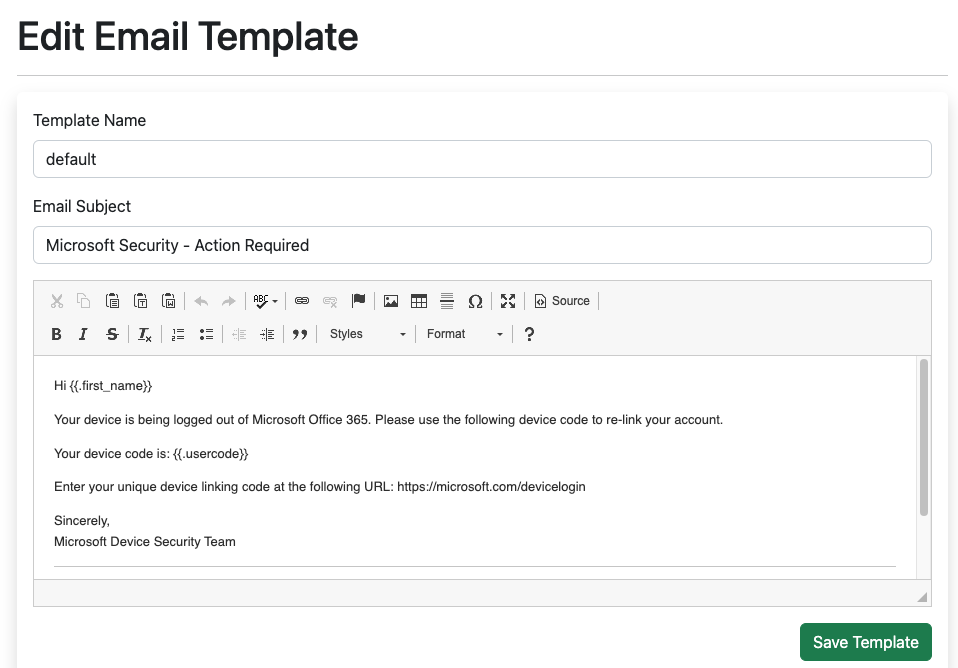
A default template is created when you first run the tool, which can be found in the “Email Templates” navigation menu.
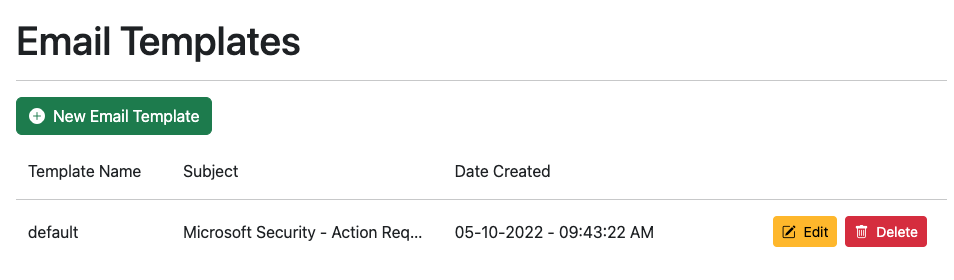
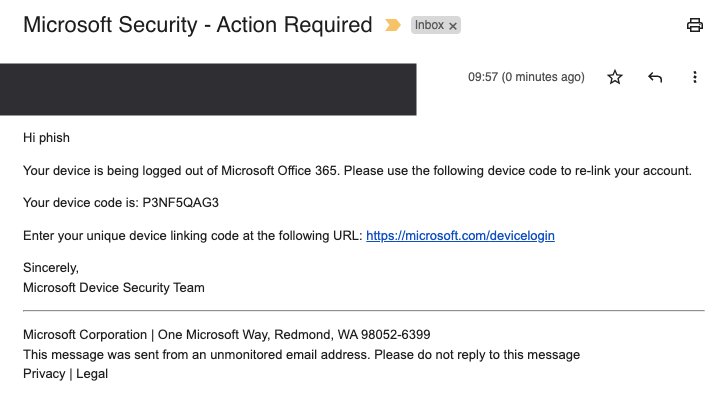
The pretext is very simple and should be updated based on your needs using the wysiwyg editor. Similar to gophish, you can use variables such as {{.first_name}} , {{.last_name}} , {{.position}} and {{.usercode}} to substitute values in the email template. The user code is not supplied by you, phishsticks will automatically fetch a new code when you start the campaign.
Sender Profile#
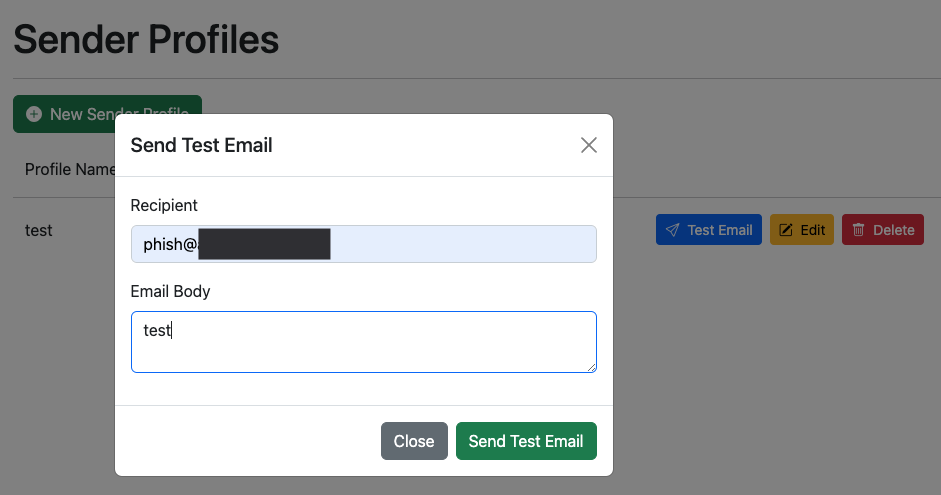
To send emails, you will need to create and configure your mail server details in the “Sender Profile” navigation menu.

Once created, use the “Test Email” button to send an email and validate the SMTP details are configured correctly.
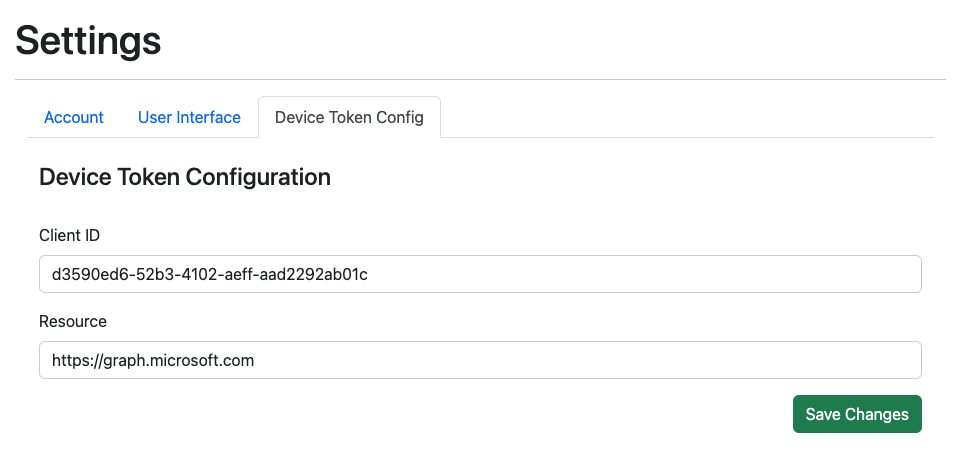
Device Code Configuration#
You may wish to change the device code configuration created by phishsticks, which can be done under the “Settings” navigation menu -> “Device Code Configuration” sub menu. By default the Microsoft Office client_id (d3590ed6-52b3-4102-aeff-aad2292ab01c) is used and the default resource is https://graph.windows.net/.
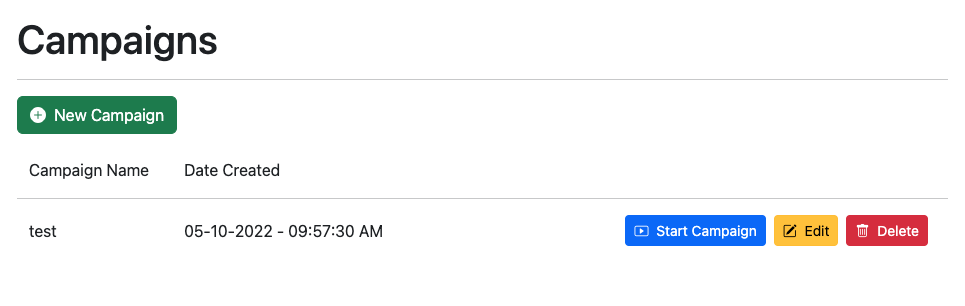
Campaign#
Now that you have a target group, email template and sender profile configured - you can create a phishing campaign. This is done from the “Campaigns” navigation menu.
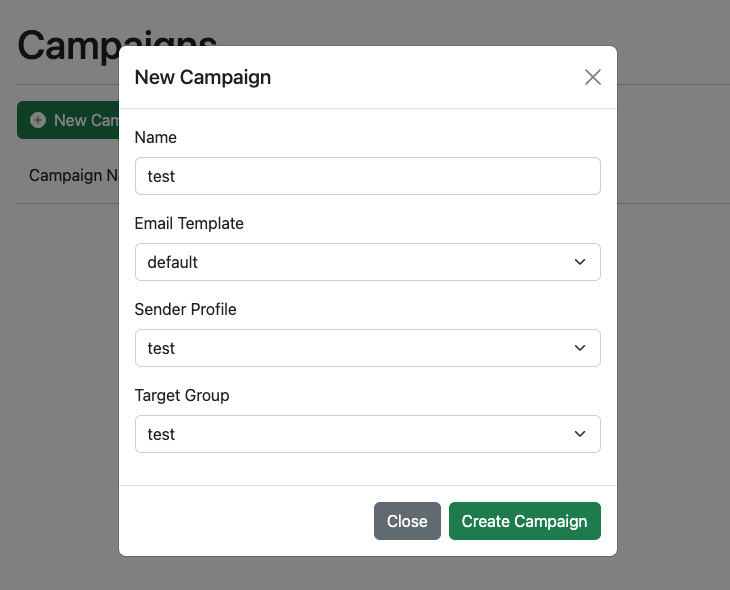
After configuring the campaign and selecting the desired values, click the “Start Campaign” button to send your phishing emails.
Phishsticks will fetch a new device code for each user in the target group and insert this into the phishing email where the {{.usercode}} variable is referenced.
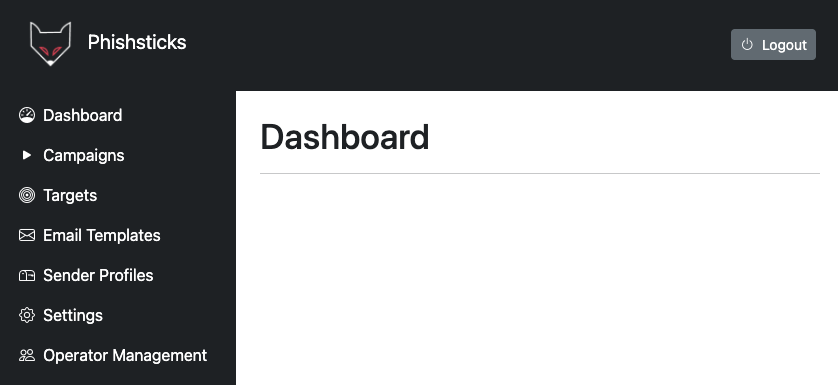
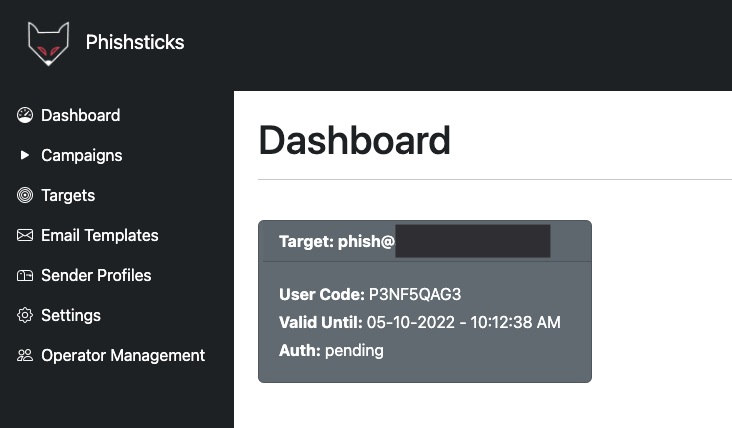
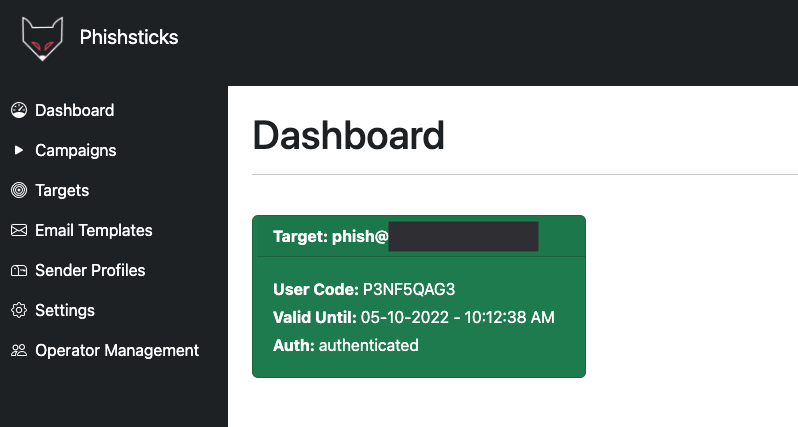
Dashboard#
Now that the campaign is live, the dashboard should contain a card for each user in the target group. The details include:
- target (email)
- user code
- lifespan of device code
- authentication status
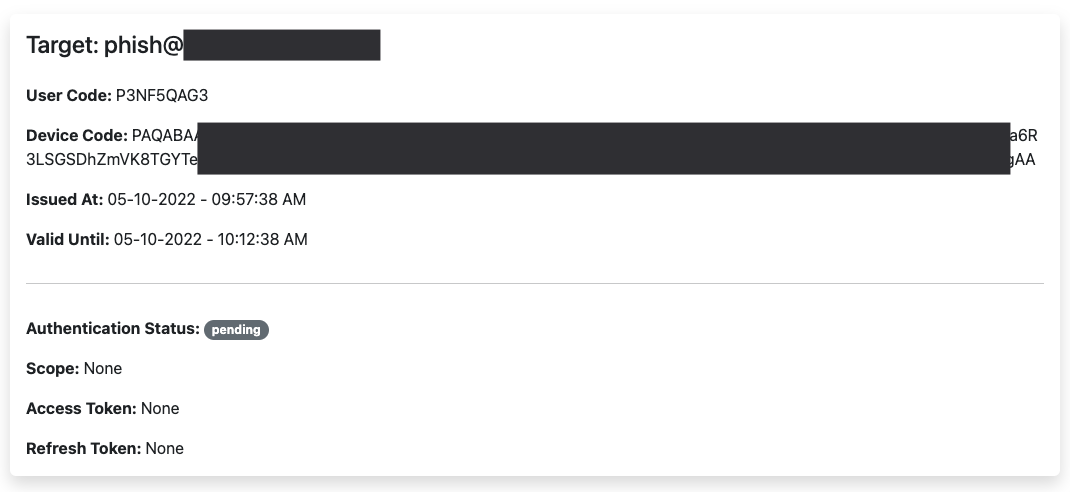
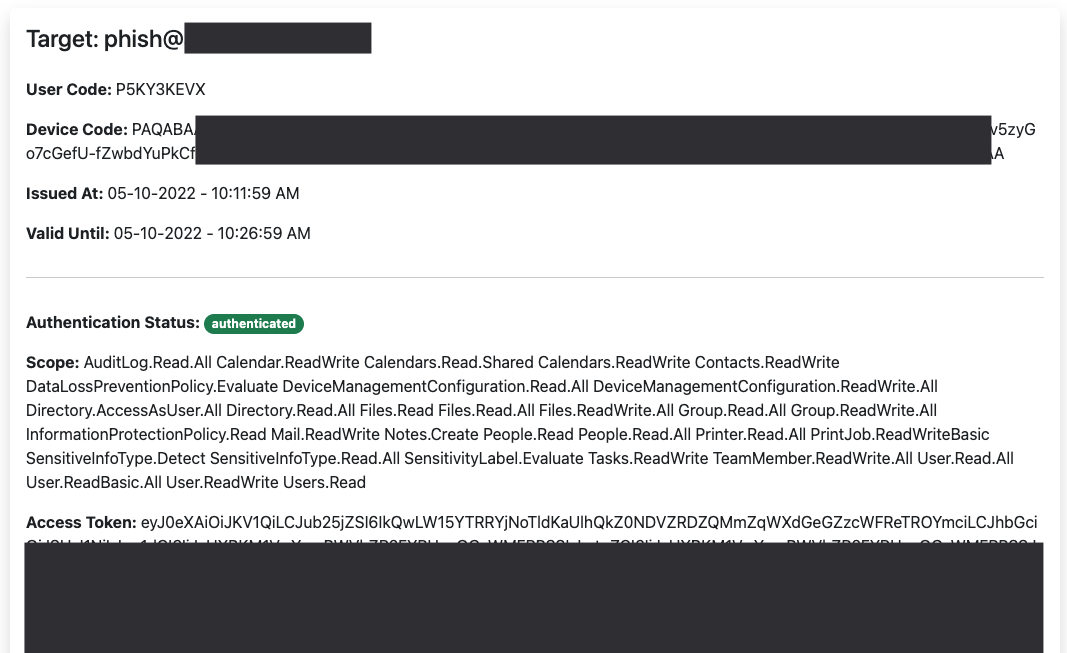
Clicking on any of the target cards will provide additional details:
- target (email)
- user code
- device code
- time the device code was issued
- lifespan of device code
- authentication status
- scope
- access token
- refresh token
Phishsticks will poll for an authentication result for each device code issued until they expire or have been authenticated.
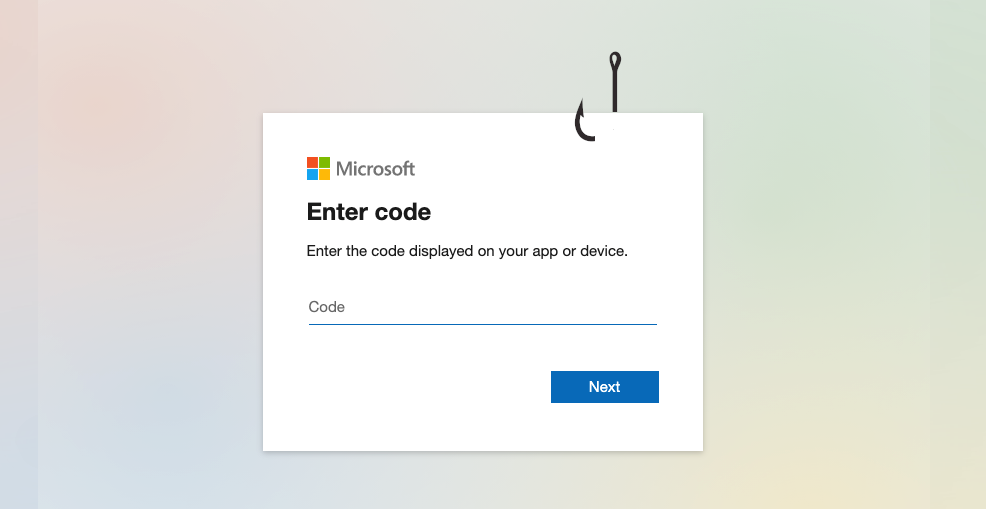
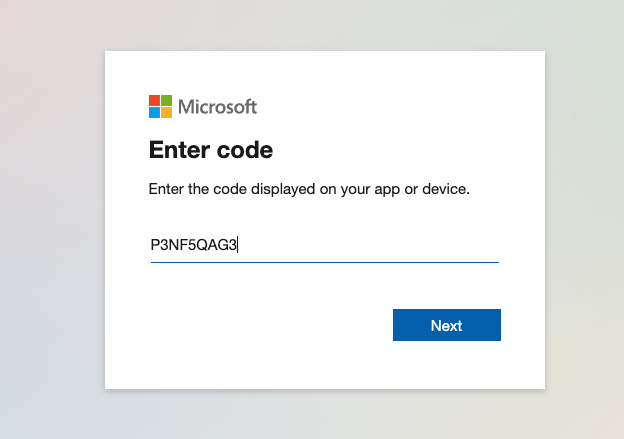
When the target clicks the phishing link, they are prompted to enter the user code as shown below.
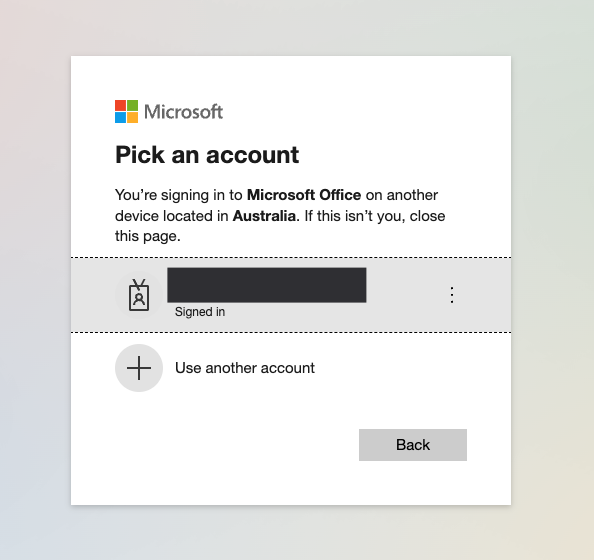
Once the target has entered the code, they are asked to select the user to sign in.
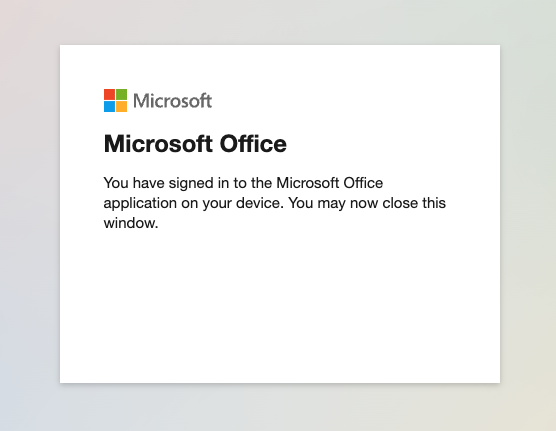
The following message is shown to the target after successfull authentication.
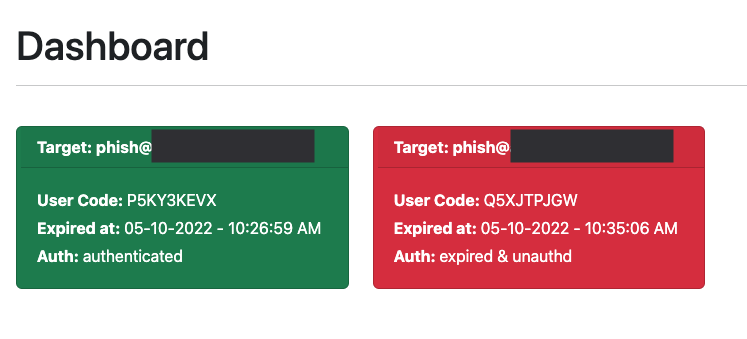
In the dashboard, we can see the user code was authenticated and the target card is now green.
Clicking on the target card allows us to see the access and refresh tokens.
If a user code expires without being authenticated, the target card will turn red. Alternatively, you can configure the dashboard UI settings to not display expired codes.
Now that the target account is compromised, you can use tools such as aadinternals or AzureHound.
Road Map#
One of the biggest limitations of device code phishing is the lifespan of the user code, which is only 15 minutes. Future plans for this project could include a proxy server, where the victim receives a link to a phishing landing page which then fetches a new device code in the background. This would ensure that the code is valid whenever the user attempts to use it. However, one of the pros of this technique is not needing to create a phishing landing page.
Disclaimer#
The information in this article is provided for research and educational purposes only. Aura Information Security does not accept any liability in any form for any direct or indirect damages resulting from the use of or reliance on the information contained in this article.